
Recreate a Prairie
As increasing numbers of settlers moved west in the late 1800s, they turned the land into farms, transforming the tallgrass prairie into what is now known as “America’s bread basket.” The few sites that remain are a part of our heritage that is quickly diminishing. It is now crucial that we protect, manage and learn from the last few prairie remnants and incorporate prairie plants in future restoration projects and landscape designs.
The prairie landscape is a unique complex of associations so subtle they are easily overlooked. To the untrained eye, a native prairie may look like just another domestic pasture, but in reality it is an amazingly diverse plant community that may contain 200 to 300 different species of grasses and forbs.
Prairie Restoration
Beginning with prairie restoration efforts at the University of Wisconsin-Madison Arboretum in the 1930s and the re-establishment of native pastures following the Dust Bowl, the restoration movement has spread to commercial, government and private properties throughout North America’s prairie biome. The early efforts in Wisconsin and the Great Plains proved that planting vegetation resembling the native prairies was possible. Ecologically, however, replicating a prairie may be impossible. Because most prairies were not studied until they had been greatly altered or eradicated, it is difficult to know what all the components were, much less to try to recreate them. In addition, prairies’ soil structure and composition may have been irreversibly changed by development, preventing the creation of a totally restored prairie community. Because it is unrealistic to expect that such a complex ecosystem can be totally reinstated on dramatically altered sites, prairie restorations will almost always have fewer species present than natural prairies would have. This exemplifies why restoration is never a substitute for conservation, but rather a process that complements it.
Reasons for starting a prairie restoration project are varied. The benefits of landscaping with prairie plants include the natural beauty of grasses and forbs, attracting wildlife, the relatively low maintenance required after plants have established themselves, and the personal satisfaction of encouraging an ecologically supportive landscape.
Because no single procedure for recreating a prairies exists, observing and reading about natural prairie communities is important (see our list of prairie preserves below). Only a few of the relict prairie areas acquired for preservation are in a pristine or truly native condition. The best examples of natural prairies have experienced a relatively small amount of mowing or domestic grazing and only periodic burns.
Plant diversity in a restoration project initially will be less than in a natural prairie but should increase during the first five to 10 years. Of course, the more diversity the better. Native grasses are the framework of the prairie, and as much as 50 to 95 percent of the vegetation is grasses. Forbs or broadleaved herbaceous plants are seasonally codominant features of the plant community, providing the majority of the species diversity.
Types of Grasses
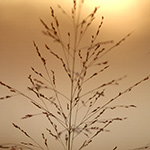
Grasses perform many functions, including providing support and protection for tall flowers; forming a dense cover that resists penetration by weeds; lending color and texture to the landscape, especially in the fall when they change color; and preventing soil erosion. Unlike forbs, the types of grasses in a tallgrass prairie vary little from region to region.The dominant tallgrass prairie species and their characteristics are:
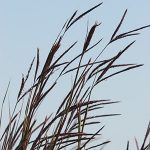 Andropogon gerardii (big bluestem): Grows robustly, up to 6 feet tall where moisture is plentiful. Dense root system extends 6 to 7 feet underground. Attractive turkey-foot shaped inflorescence makes the species easy to identify. Found in dry, mesic or wet prairies.
 Bouteloua curtipendula (sideoats grama): Attractive clump grass that grows 3 to 4 feet high. Inflorescence typically large with numerous spikelets. Spikelet color ranges from bronze to yellow, anthers are usually orange. Found in dry prairies.
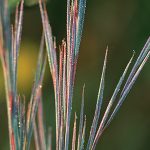
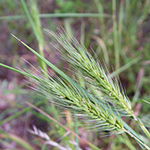 Elymus canadensis (Canada wild rye): A 2-to-4-foot bunchgrass with wide leaf blades and seed heads resembling wheat. Seed heads drop or nod when mature. Found in mesic prairies.
 Koeleria macrantha (prairie Junegrass): A short, attractive plant with dense, fluffy seed heads. Immature seed heads are silvery green and turn fluffy at maturity. Found in dry prairies
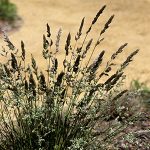
 Panicum virgatum (switchgrass): A 3-to-8-foot clump grass. Large, robust plants with bluish leaf blades. Inflorescence is pyramid shaped with purplish spikelets. Found in mesic prairies.
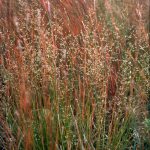
 Schizachyrium scoparium (little bluestem): At one time, it was the most abundant grass in mid-America. Very attractive clumps cast a reddish color in the fall, topped with fluffy seeds. Found in dry or mesic prairies.
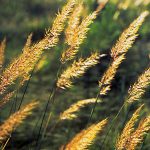 Sorghastrum nutans (yellow Indiangrass): A 3-to-8-foot clump grass with wide leaf blades and large inflorescence. Turns a handsome bronze to yellowish color in fall. Found in dry or mesic prairies.
 Sporobolus heterolepis (prairie dropseed): A 1-to-2-foot graceful and fine-textured grass that grows into fountainhead clumps. Found in dry or mesic prairies.
Species Selection
The amount of moisture in the soil determines which grassland species will grow best. Botanists often classify prairies into the following five types: dry (xeric), dry-mesic, mesic, wet-mesic and wet (hydric). Soil factors such as pH level, type and moisture determine what the dominant species are, as well as their proportions and distribution patterns. Generally, dry prairies have shallow, sandy, gravelly or limestone soil and cover hilltops and slopes; dry-mesic prairies develop on moderate slopes with deep mineral soil; mesic prairies are found on flat, well-drained silt-loam soil with a deep organic layer; wet-mesic and wet prairies occur on low, flat land near rivers and marshes and are often flooded in the spring.
Haphazard placement of prairie grasses and forbs into the landscape is ineffective. Plan carefully to match species to types of soil conditions — this is an important step. One approach to planting a prairie is to plant a homogeneous seed mix of appropriate native species on a site and allow a natural sorting to occur over time. A more scientific approach is to analyze the site’s soil and microhabitats to determine the natural distribution patterns and match the site with appropriate groups of species for each microhabitat.
Soil Preparation
It is a good idea to start small when you begin a prairie restoration project. Working on a modest scale gives you an opportunity to learn about prairie plants and how they will adapt to your site. Remember that larger restorations will require a considerable amount of labor during site preparation, planting and initial maintenance. If you do not have the time, money and machinery to establish and maintain a large tract, establishing a smaller, more manageable plot is advisable.
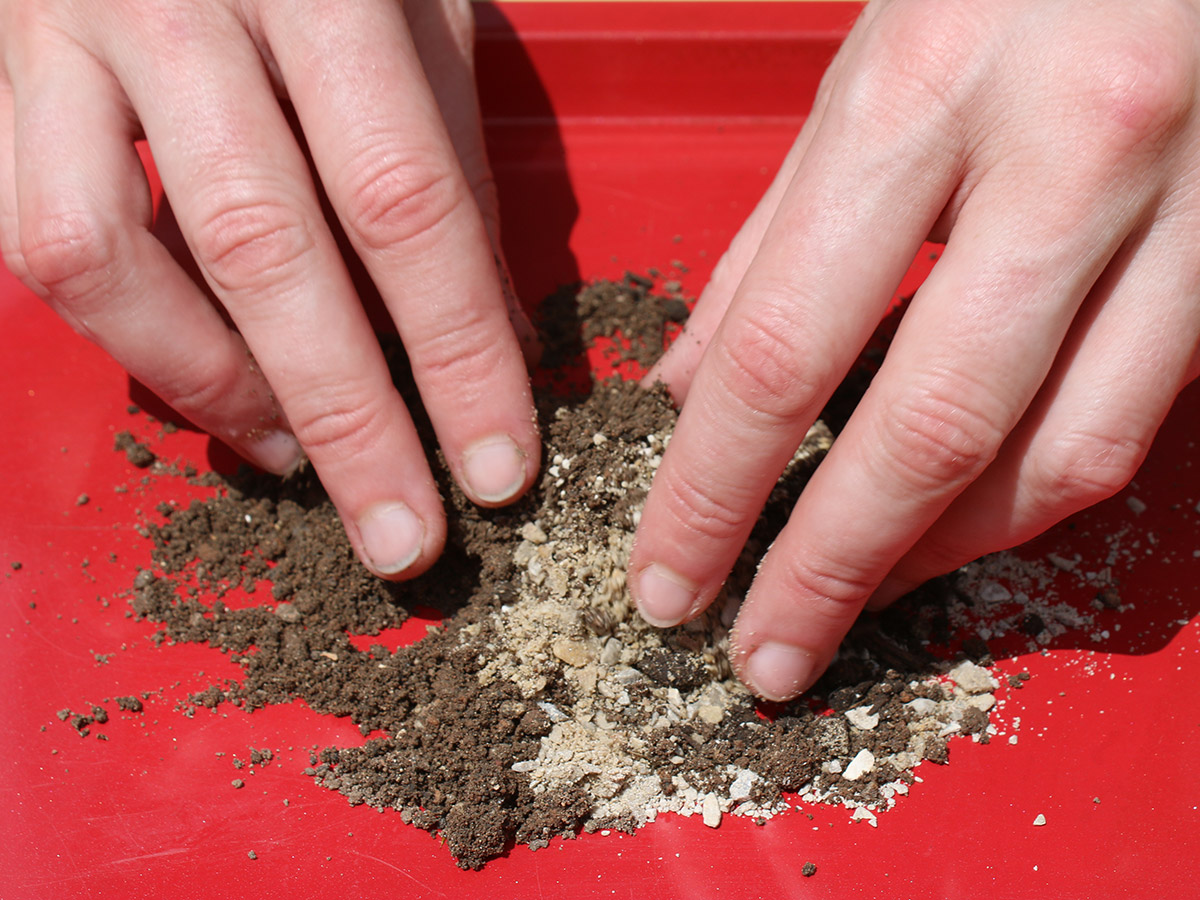
Preparing the seedbed is one of the most important steps in recreating a prairie. Proper preparation will reduce weeds, facilitate planting and provide a suitable seedbed.
A year’s lead-time is sometimes necessary for weed-controlling measures. The seeds, roots and rhizomes of weeds are frequently present in large numbers and quickly germinate after plowing. Because prairie species grow slowly above ground the first year, usually starting in spring, cool-season grasses and weeds have a distinct advantage the first two years and will readily choke out young plants. After two to three years, prairie plants will be able to outcompete most invading weeds.
Several options exist for preparing the ground for planting, including:
- Lightly disk the site throughout the growing season whenever a new crop of weeds germinates. You may need to repeat this process several times before planting. Weed rhizomes will be killed when they are exposed to sun and frost during this repetitive process. Don’t disk too deeply because that will constantly expose dormant weed seeds.
- If cool-season species are present prior to planting, lightly disk again and seed immediately.
- If you do not have a year’s notice, lightly disk in the spring and follow up with one or two additional light diskings to remove any weeds that have germinated. Disk immediately before planting.
Planting Times
Upper Midwest: Last half of May until June 15 (or about the same time corn is planted)
Midwest: May (or about the same time corn is planted)
Southern Plains: Late February and March
Planting at these designated times allows for the removal of cool-season weeds. If weeds are not an extreme problem, an early spring or late fall planting (late enough so seeds will remain dormant during winter) provides for more natural stratification (chilling) of seeds. Seeding later than these optimal spring planting dates increases the chance of inadequate rainfall. Like any other seeds, prairie species’ seeds require adequate water to germinate. It is important that seeds are not allowed to dry out once they start taking in water.
Although it is more labor-intensive, transplanting can accelerate the establishment process. Never remove plants from an area unless it’s undergoing development! Always get permission from the property owner before digging up any plants. Transplants can be obtained from several sources. Keep an eye out for local prairie remnants threatened by highway or building construction, improper maintenance or farming. Seedlings from wild-collected or commercial seeds can be raised in greenhouses and transplanted to the field. If they are raised in greenhouses, they can be introduced in the fall or in early spring before lush growth appears. Many prairie plants are available through commercial sources.
Prairie transplants should be watered regularly until they are well-established. Transplant only when plants are dormant, either in late fall or early spring, and extricate as much of the root system as you can when digging them up. Shake soil clumps from the root system, and immediately place the roots in a moist, protected environment. Some people fold transplants into dampened burlap, other put them in restaurant bus pans slightly filled with water. Sort the plants, divide and root prune in a shady, protected place. All plants must be kept moist and protected from the sun; a cloudy, calm day is ideal for transplanting. Relocate transplants as soon after digging as possible.
Planting Techniques
There are several basic seeding techniques: hand broadcasting, cultipacking and drill seeding. All have advantages and disadvantages.
You can hand broadcast seeds into a prepared seedbed, rake the seeds into the soil and then compact with a roller to ensure good seed-to-soil contact. The advantages of this method include small equipment investment, and the seeds are not distributed in rows. However, it is difficult to achieve uniform distribution of seeds.
Ranchers usually use cultipackers to plant grasses and improve pastures. The machines are designed with a seed box that can be set at a specific seeding rate to plant wildflowers and native grasses. A roller bar on the cultipacker packs the seeds into the soil, ensuring good seed-to-soil contact. The machines are labor-efficient and provide even seeding rates and depths. But there is limited availability of equipment, and appropriate sizing to a tractor may be difficult.
Drill seeders are used to plant grass seeds (John Deere, Truax, and TYE are three well-known manufacturers). They cut furrows into the ground, and seeds are dropped at the recommended rate. Often the seeders drag a chain or rubber tire behind to work the seeds into the soil and tamp them down. Running the drill seeder in one direction and then making a second pass over the same area but perpendicular to the first pass is effective. Drill seeders are labor-efficient and provide even seeding rates and depths; one drawback is that seeds are planted in rows. (More even coverage can be achieved by removing the double-disc opening and disconnecting the tube. The tube can be left hanging or removed.)
Another planting method utilizes a spreader to plant seeds, followed by a spiked-tooth harrow to work seeds into the soil. A spiked–tooth harrow is a light-covering device that can be dragged behind a tractor or attached to another piece of equipment such as a drill seeder.
The recommended seeding depth is ¼ to ½ inch. Seeds should be covered by soil at a depth that is one to three times the diameter of one of the seeds. Small seeds should only be pressed into the soil surface.
Seeding Rates
Seeding rates vary depending on the species and the viability of that year’s seeds. Generally, 11 to 13 PLS (pure live seeds) per square foot is recommended. In critical areas where erosion control is a concern, the standard seeding rate is generally doubled. The proportion should be no less than 60 percent grass seeds to 40 percent wildflower seeds.
After Planting
The First Year
If you have included annuals in your mix, they will germinate the first year and visually dominate the site. Although many perennials also germinate the first year, their root growth comprises two to three times the biomass of above-ground vegetation during the first year. Usually grasses will not flower or set seed the first year and will probably grow only 2 to 3 inches tall by the end of the growing season. Under favorable environmental conditions, Schizachyrium scoparium (little bluestem), for example, develops a 2-to 3-inch primary root system before an aboveground shoot appears.
If tall weeds are shading the prairie seedlings, mow above the seedlings several times the first year to help suppress annual weeds. A scythe or hand clipper will do the job if a mower is not available or mower blades cannot be set high enough. Most of the weeds will be annuals, and mowing before seeds set destroys the seed crop. Optimum mowing time and height varies with each site and may be necessary the second and third years, as well. In many cases, hand weeding or spot applications of herbicide cannot be avoided, especially if aggressive species or perennial weeds dominate the site.
The Second Year
Most grass species will flower and produce seeds the second year with an average amount of moisture. Some biennial and perennial wildflower species also will bloom. If optimum conditions did not exist the first year, more seeds will continue to germinate.
The Third Year
By the third or fourth year, your prairie will benefit from a spring burn. Fire is a natural process within the prairie ecosystem and helps reduce woody plants and other invaders. Burning also stimulates prairie plants to produce aboveground vegetation the next growth season and induces some dormant seeds to germinate. It is a tool that should be incorporated into prairie management practices every three or four years. Remember that burning is a technique that requires special expertise and should never be attempted before consulting experienced experts!
You may choose to reseed or spot-transplant species to fill in bare spots or increase the diversity of vegetation in the prairie planting, especially in the second or third years after seeding.
Once established, a restored prairie is less expensive to manage and requires fewer resources to maintain than a traditional landscape. Because they have survived thousands of years, prairie plants are proven performers.
Prairie Preserves
OKLAHOMA: Part of the largest remaining tract of original tallgrass prairie is found in the Osage Hills of northeastern Oklahoma. The nature Conservancy recently purchased 30,000 acres of that land for the beginning of the Tallgrass Prairie Preserve. For more information, contact: Natural Heritage Inventory, Oklahoma Biological Survey, Sutton Hall, Room 303, 635 Elm St., Norman, OK 73019.
How-Tos
Increase your skills and knowledge with these pro tips from our experts

Mr. Smarty Plants
10,000 answers to your gardening and plant questions

Classes & Programs
Participate in one of our popular educational programs